
1957 Moto Morini 175GT Gearbox Assembly
The disassembly of the gearbox and basic information about how it works are discussed on a separate page.
I had no guidance on how to re-assemble the gearbox so I had to retrace some of my steps as I worked out the best approach, and I made one big mistake (documented below) that cost me only time, but overall this job went quite smoothly. I think anyone who gets this far into a Morini 175 engine will have no trouble assembling the gearbox with this guide. Use common sense to decide what needs to be lubricated during assembly. Some things can be lubricated later and it keeps the mess down. I used engine oil.
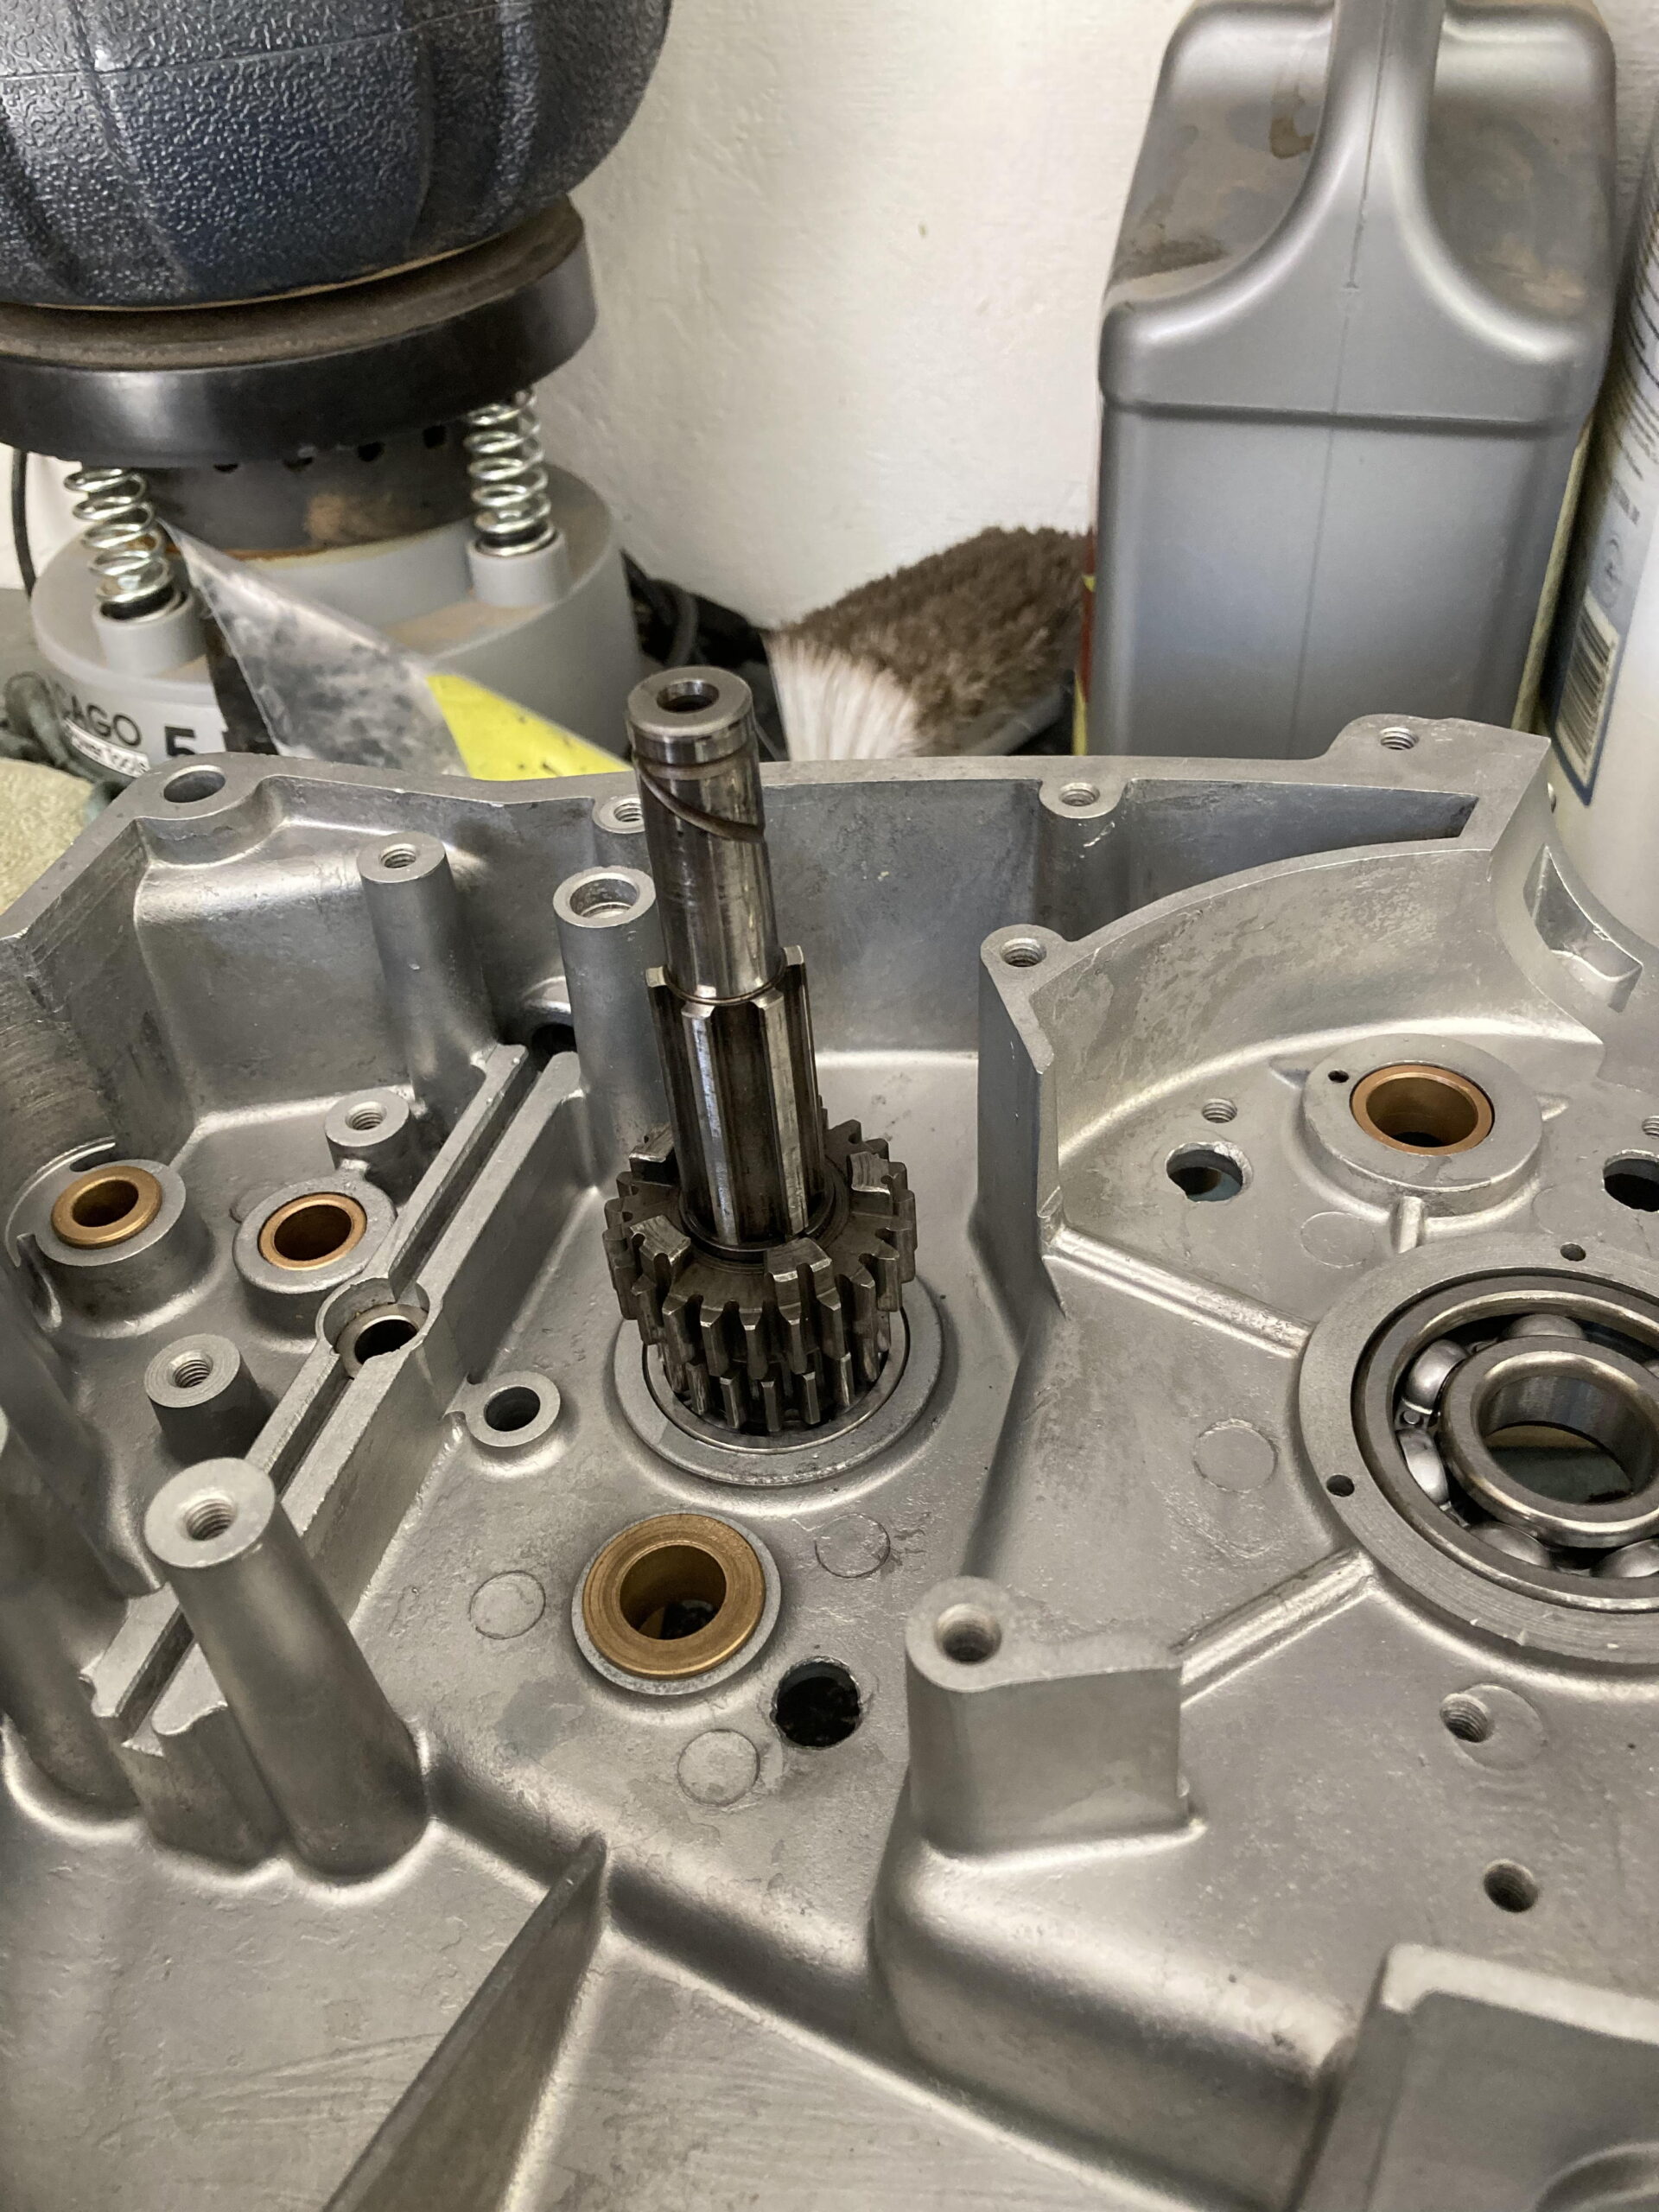
If you’re wondering how I got the case so clean, I had the cases vapor-blasted (before installing the new main bearing you see in the picture below). It is not cheap: $315 to do both engine cases and the three outer covers (the dynamo side also has an inspection plate), but I think it is worthwhile, especially considering how pristine the rest of this motorcycle is.
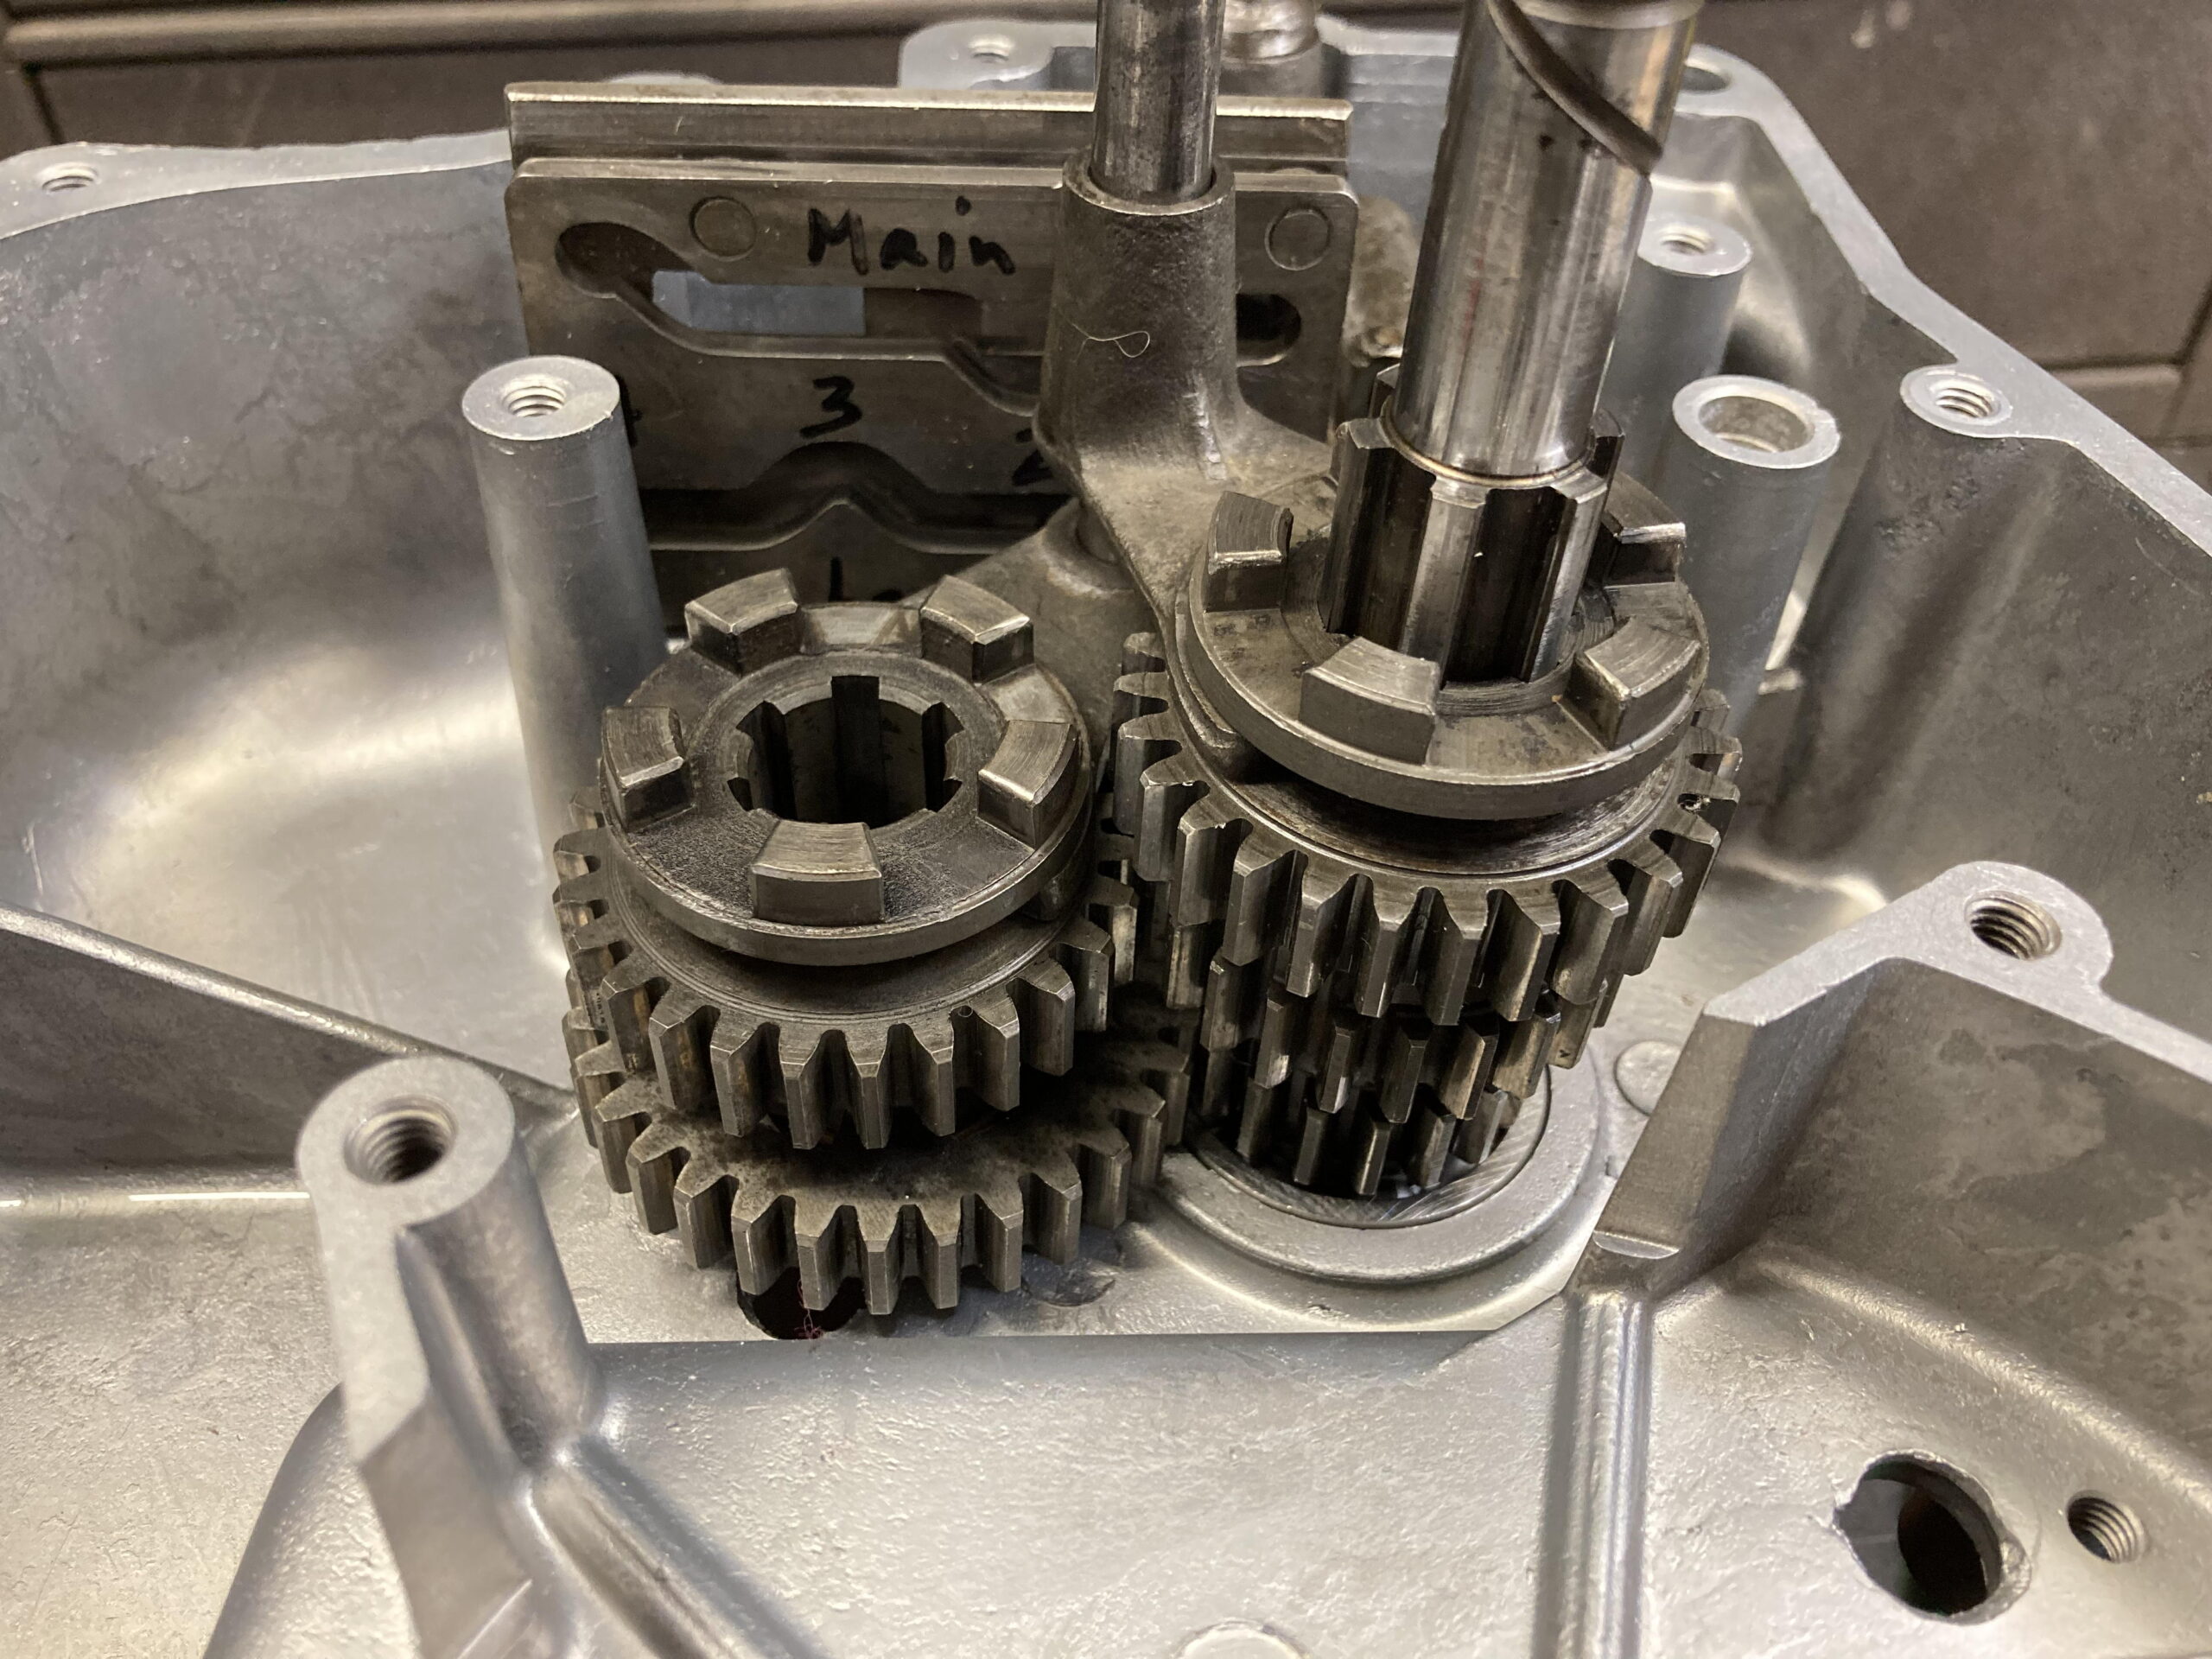
Start by setting the engine case on a pair of blocks to provide room for the mainshaft and then insert the mainshaft into the bearing in the engine case, with only the two lowest gears (they cannot be easily removed from the mainshaft), mainshaft first and second.
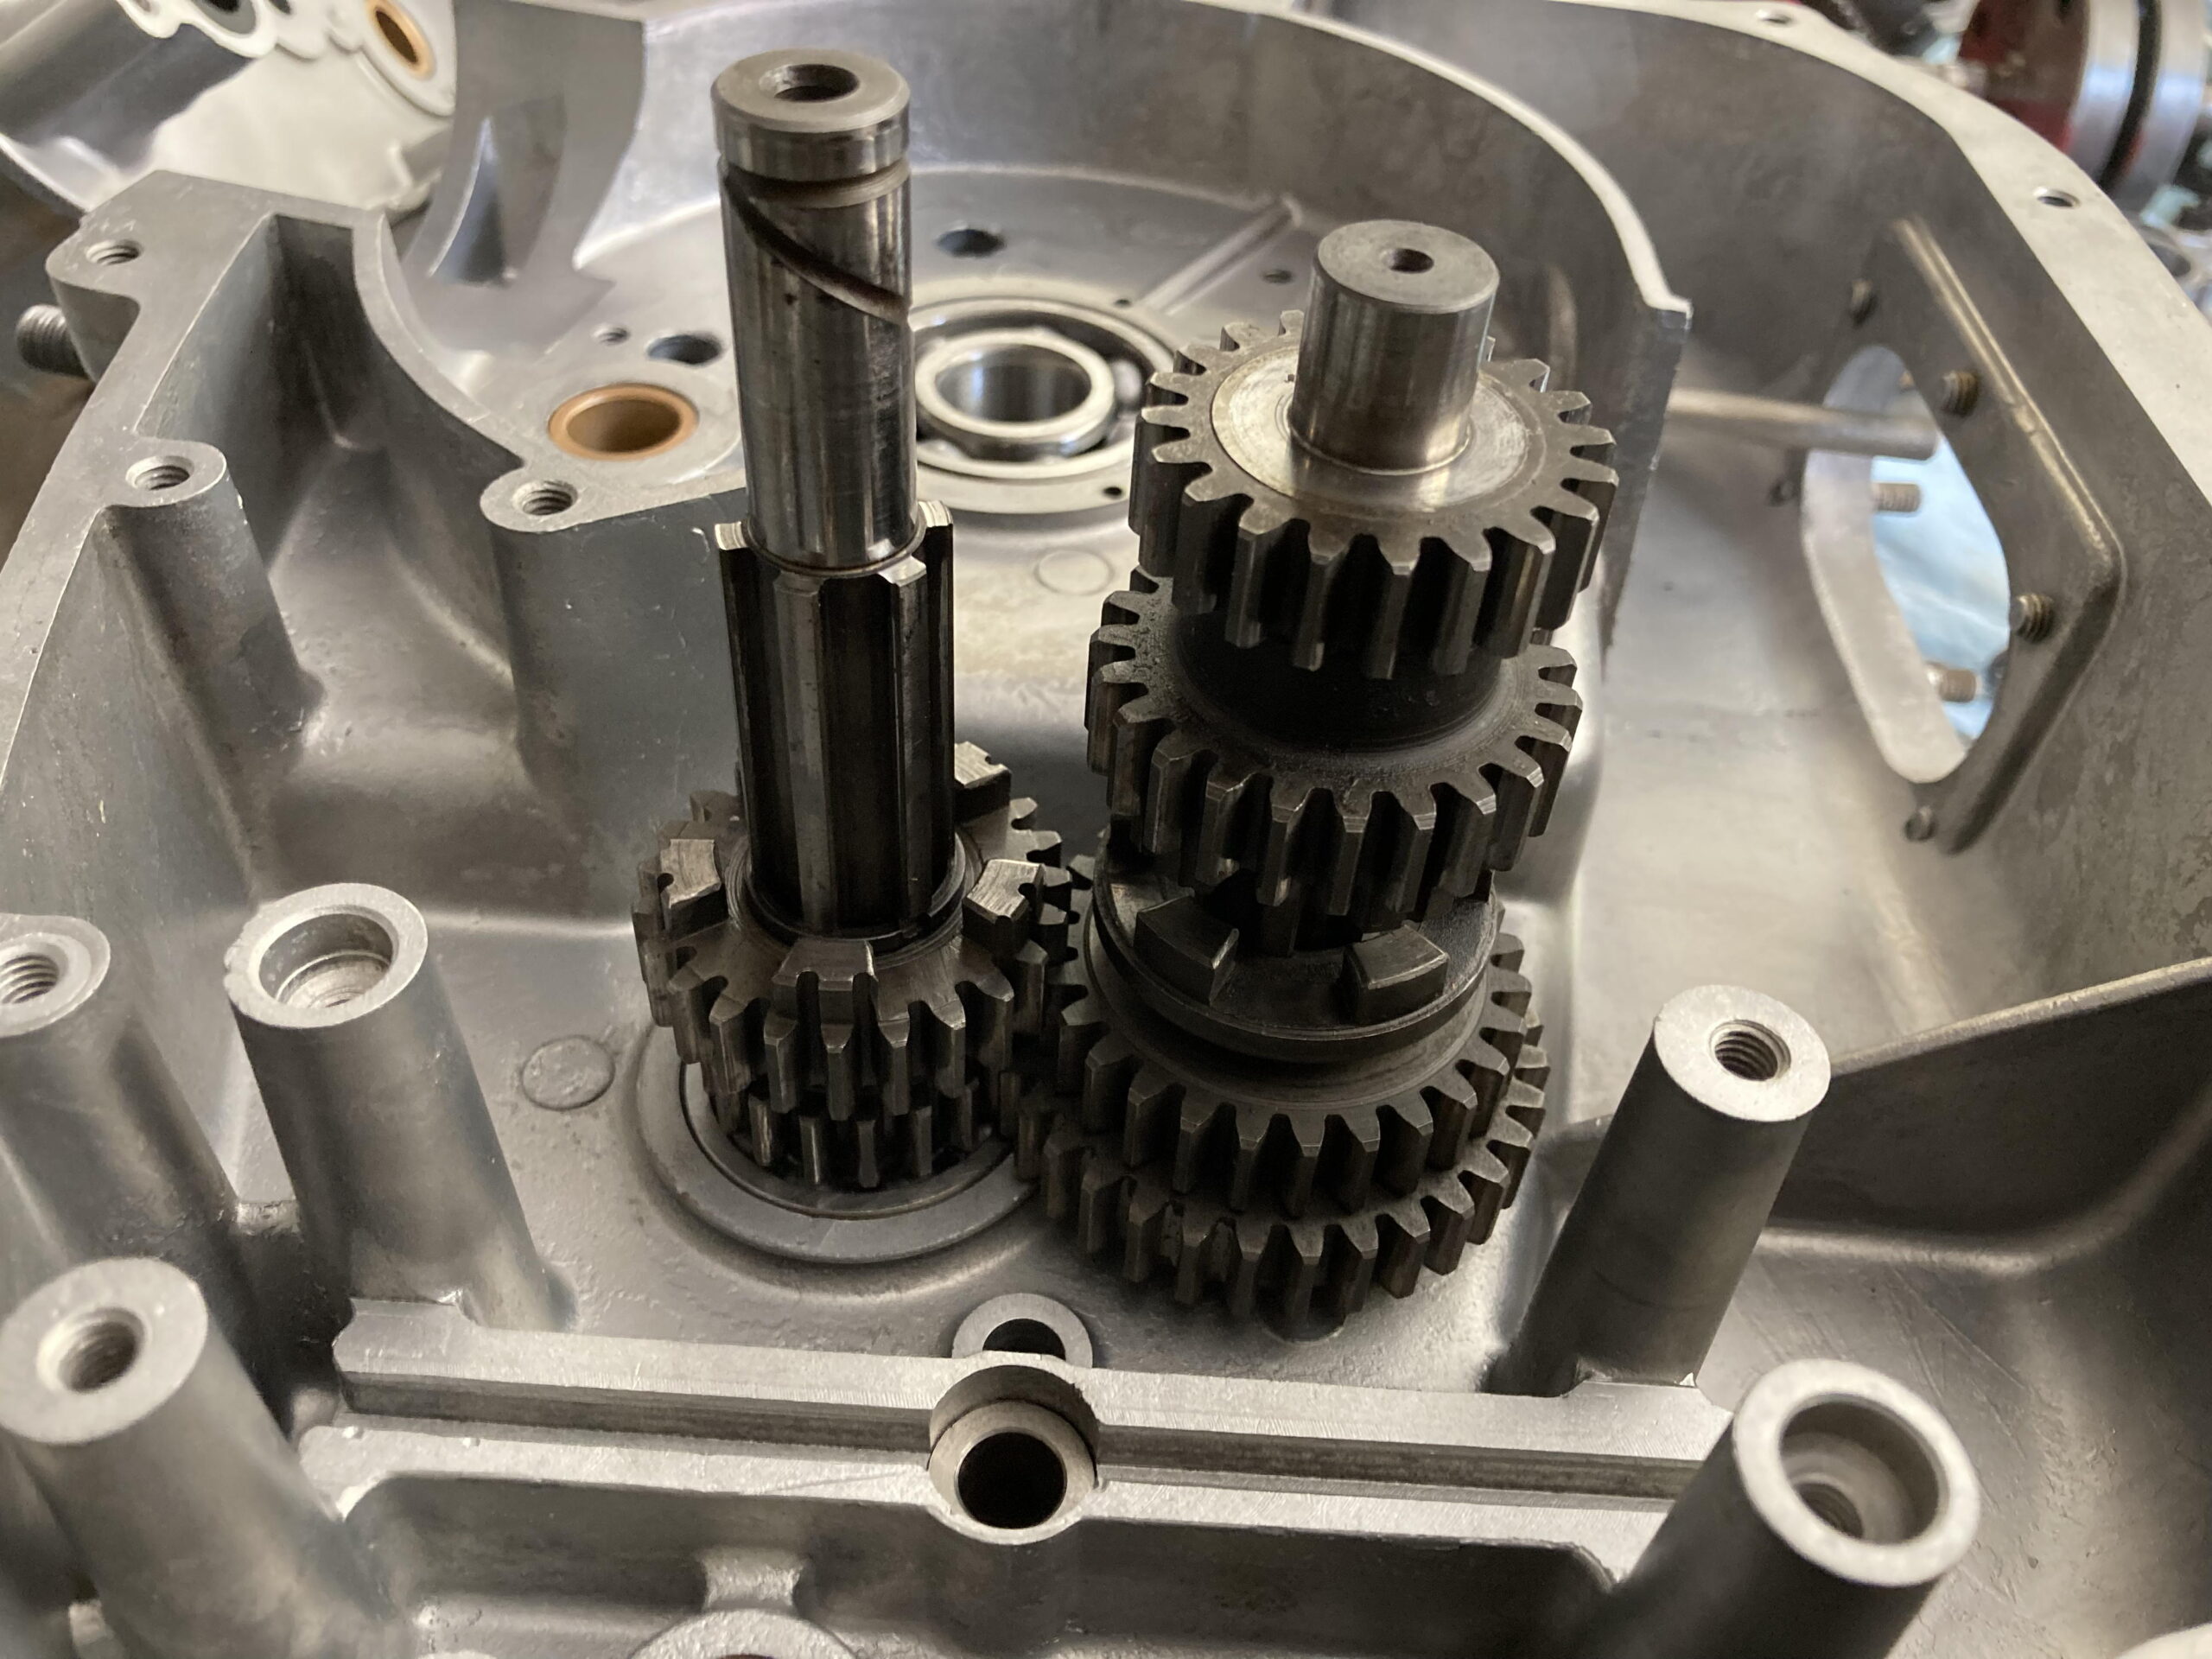
Next place the two bottom gears of the layshaft over the layshaft bushing, meshing with their respective mainshaft gears, and fit the layshaft (with two top gears) through them and into the bushing. Note the orientation. The groove for the shifter fork is above the gear on the layshaft second gear slider. The bottom gear (layshaft first gear) is oriented so that the dogs of the layshaft second gear slider engage it when they are brought together. That’s what locks first gear to the layshaft. If you do it wrong you won’t have first gear.
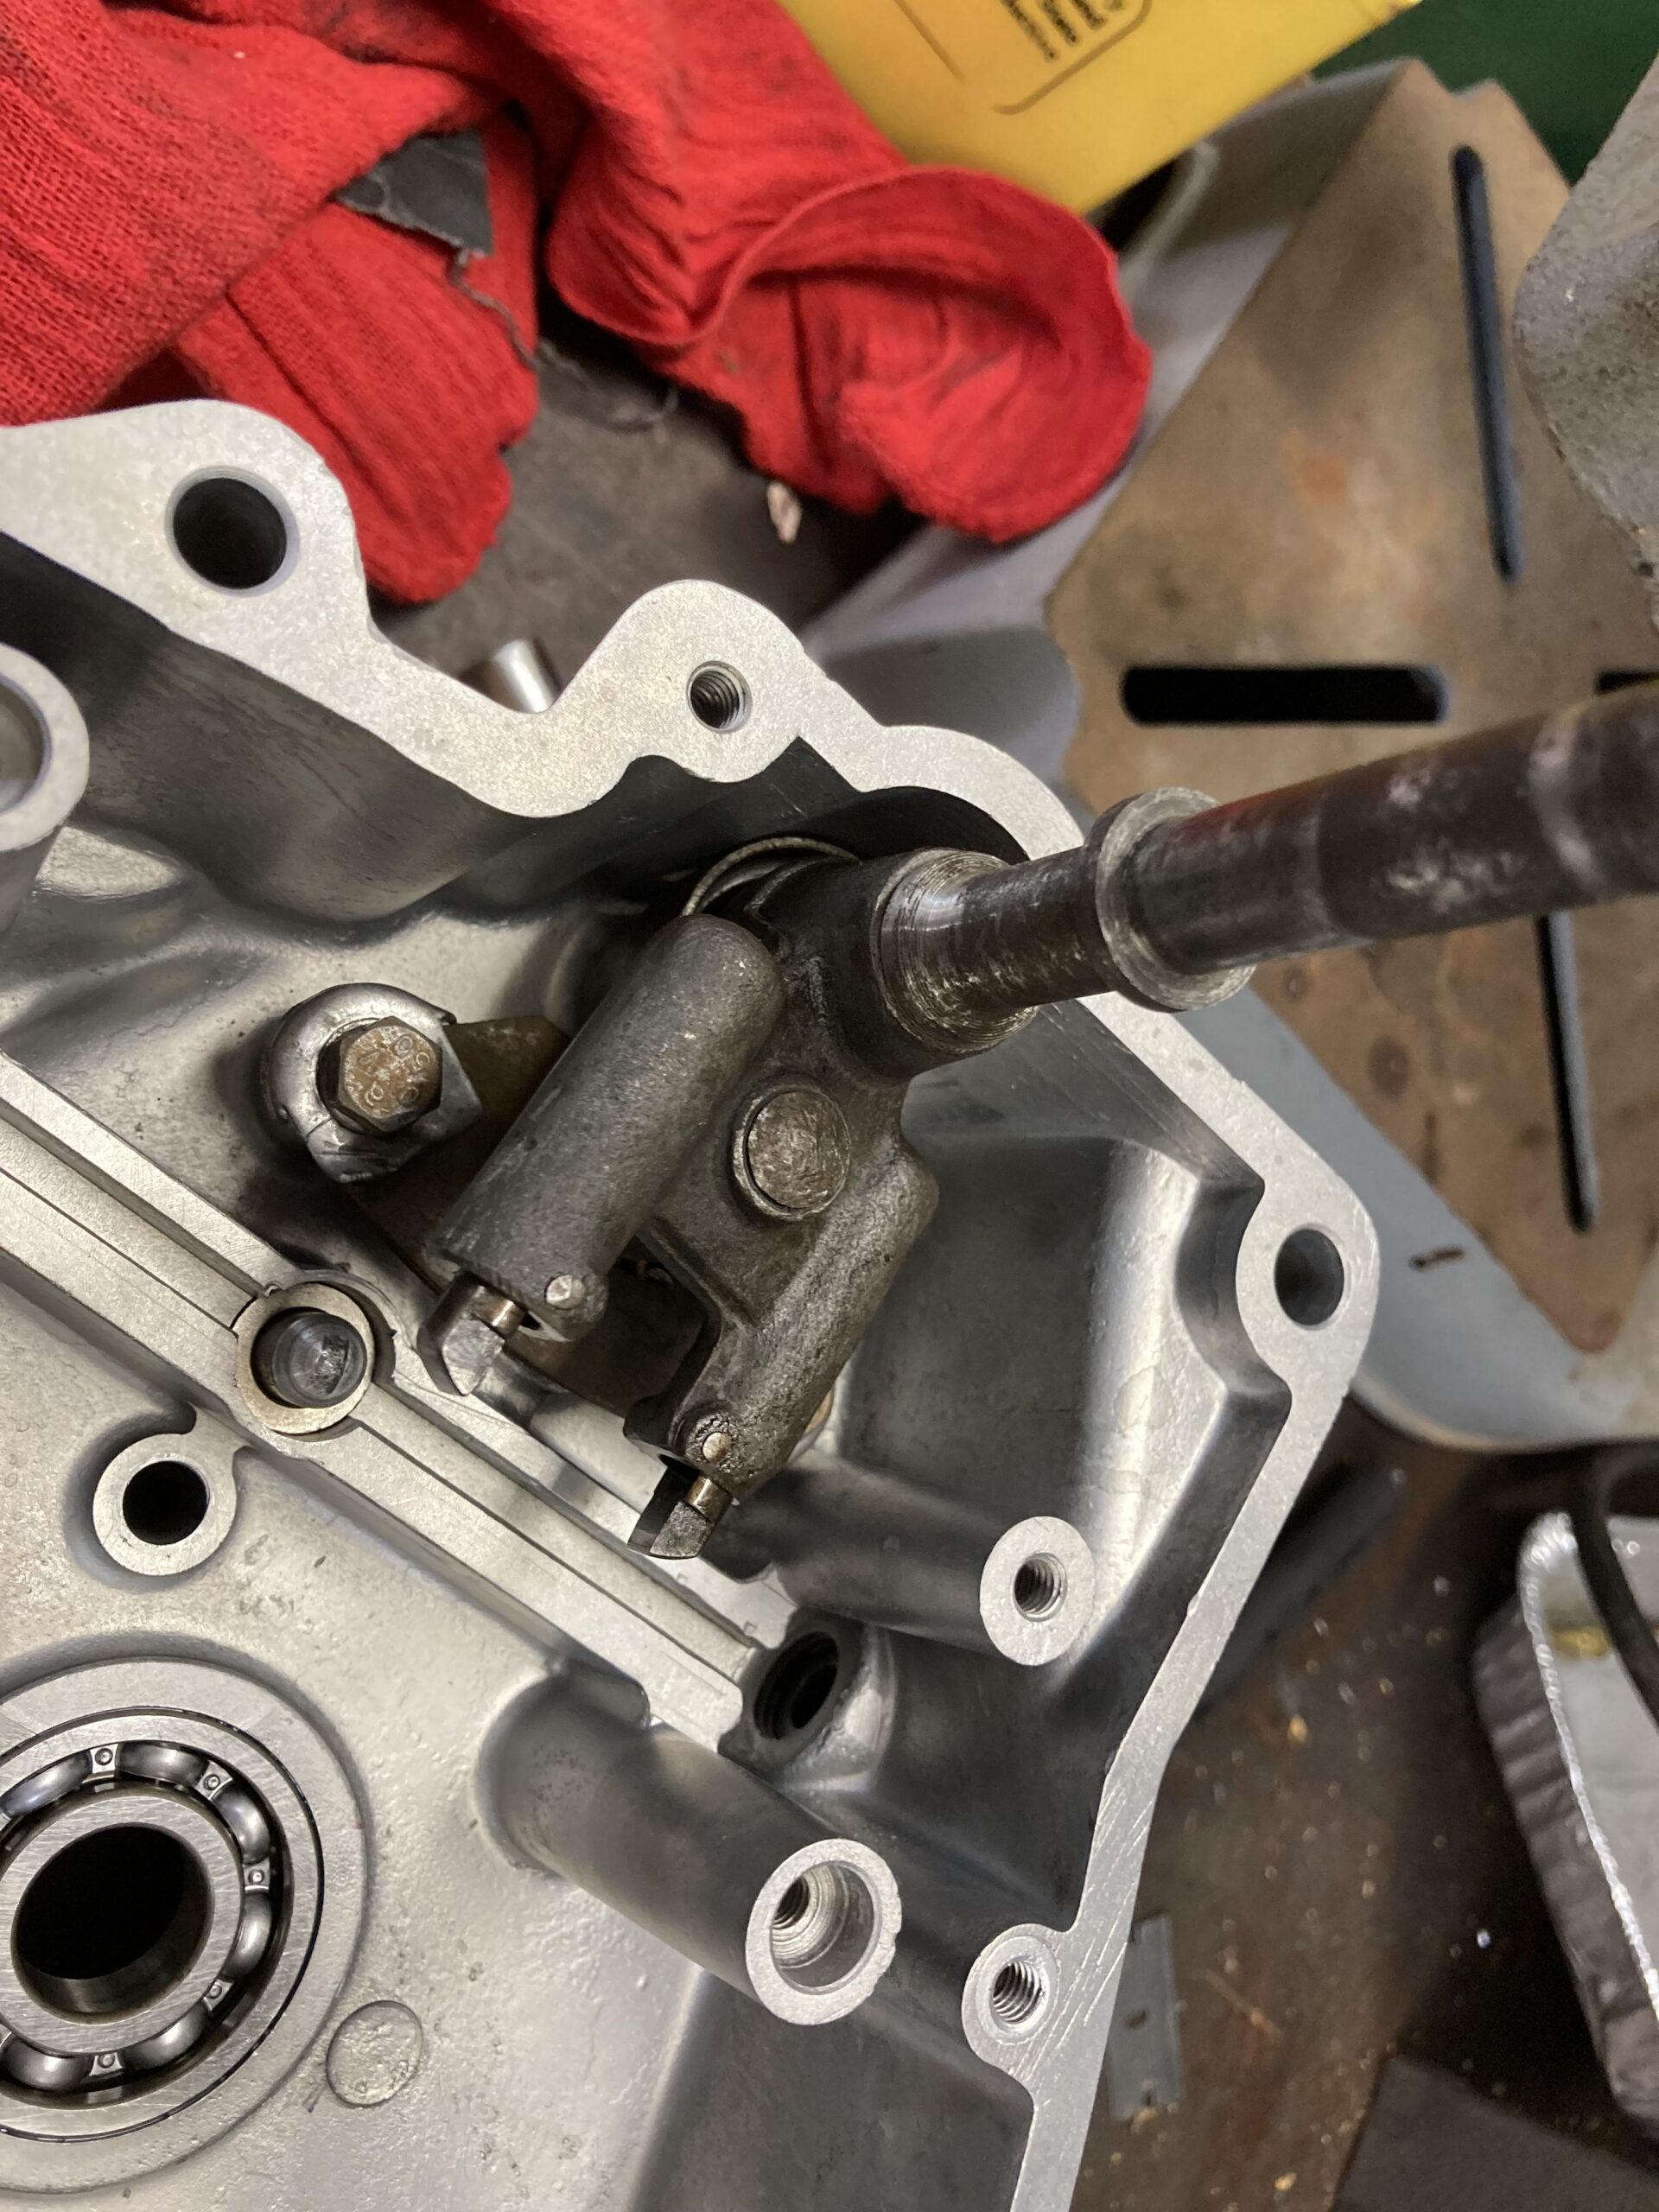
Install the shift shaft and the limiter plate. The bolts for the limiter plate have special locking tabs. I did this before installing the mainshaft and layshaft. The order doesn’t matter. Install the selector plate detent button and spring into the case.
Next, place the selector plate in position but don’t put the top guide on yet; it’s convenient when fitting the shift forks to be able to wiggle things a bit. I inserted the plate in the neutral position, but I’m not sure that it makes any difference which gear position you choose. Now you can place the two shift forks into position (upper one goes to the mainshaft sliding gear) so that the bores line up with the bushing in the engine case and the shift pegs are in their respective tracks of the shift selector plate. Without the top guide installed the detent button pushes the selector plate up and out of alignment. The idea is to get things close, then install the top guide and carefully tighten the bolts, making sure nothing is binding up.
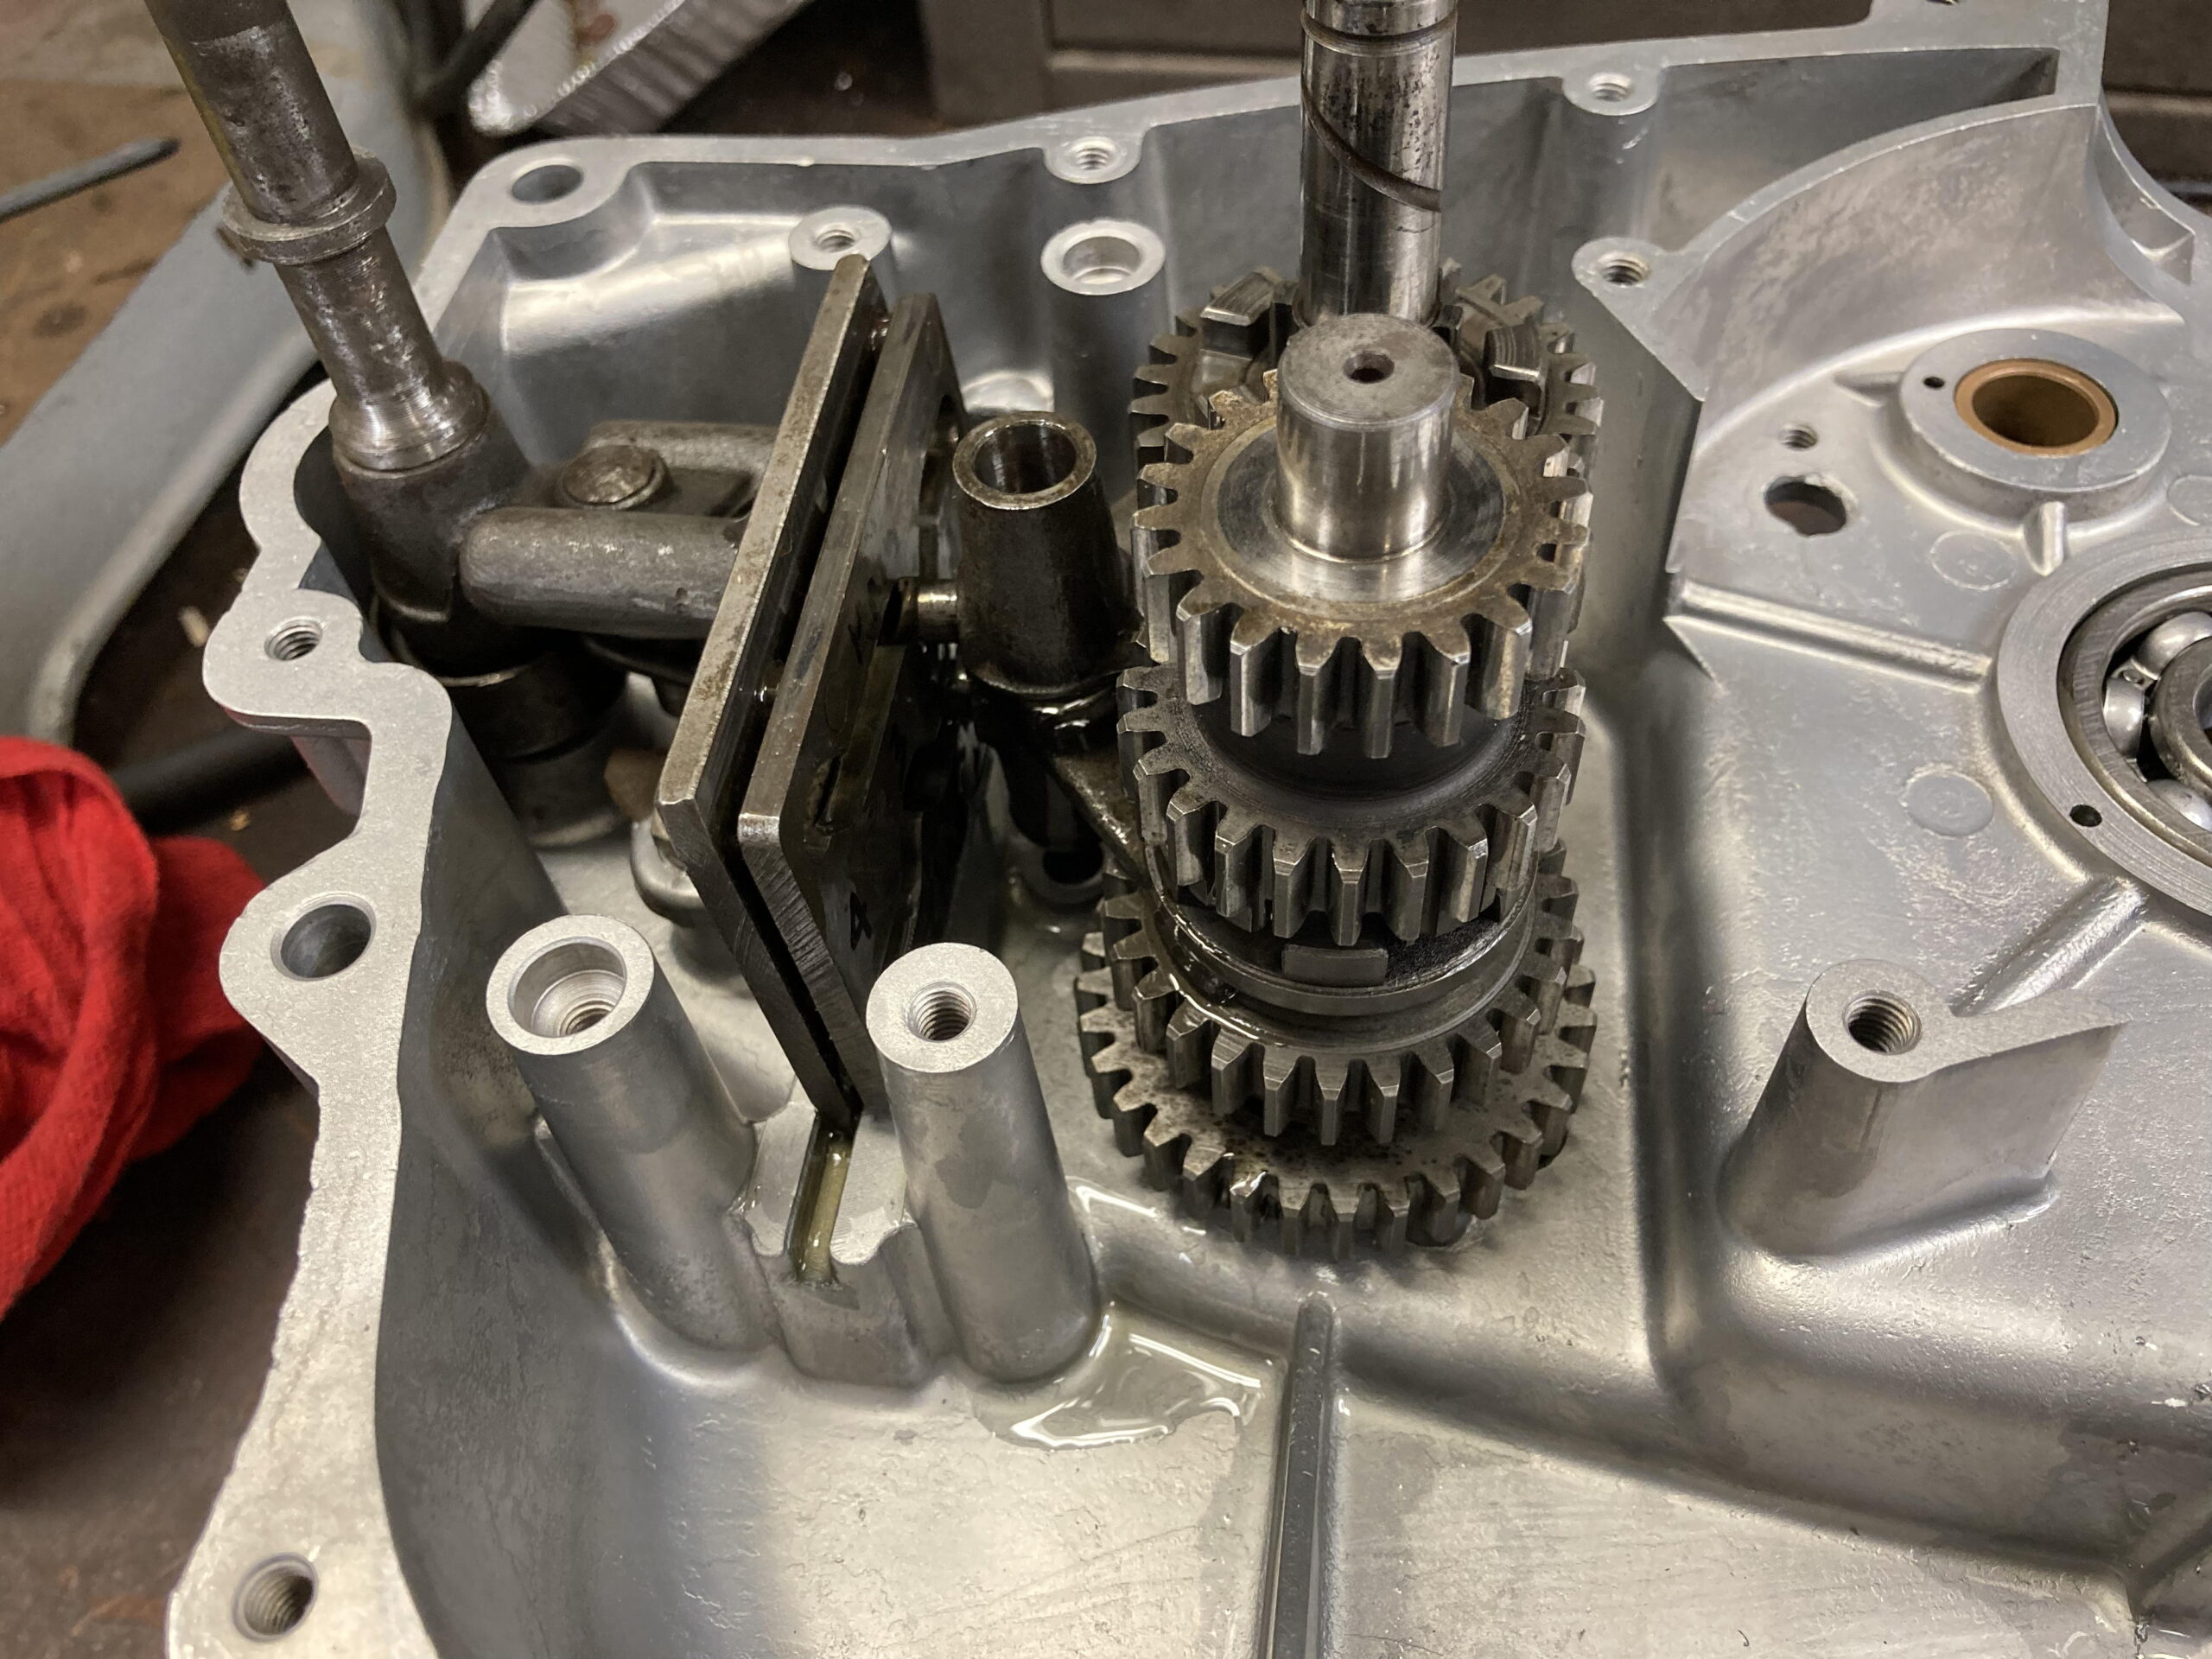
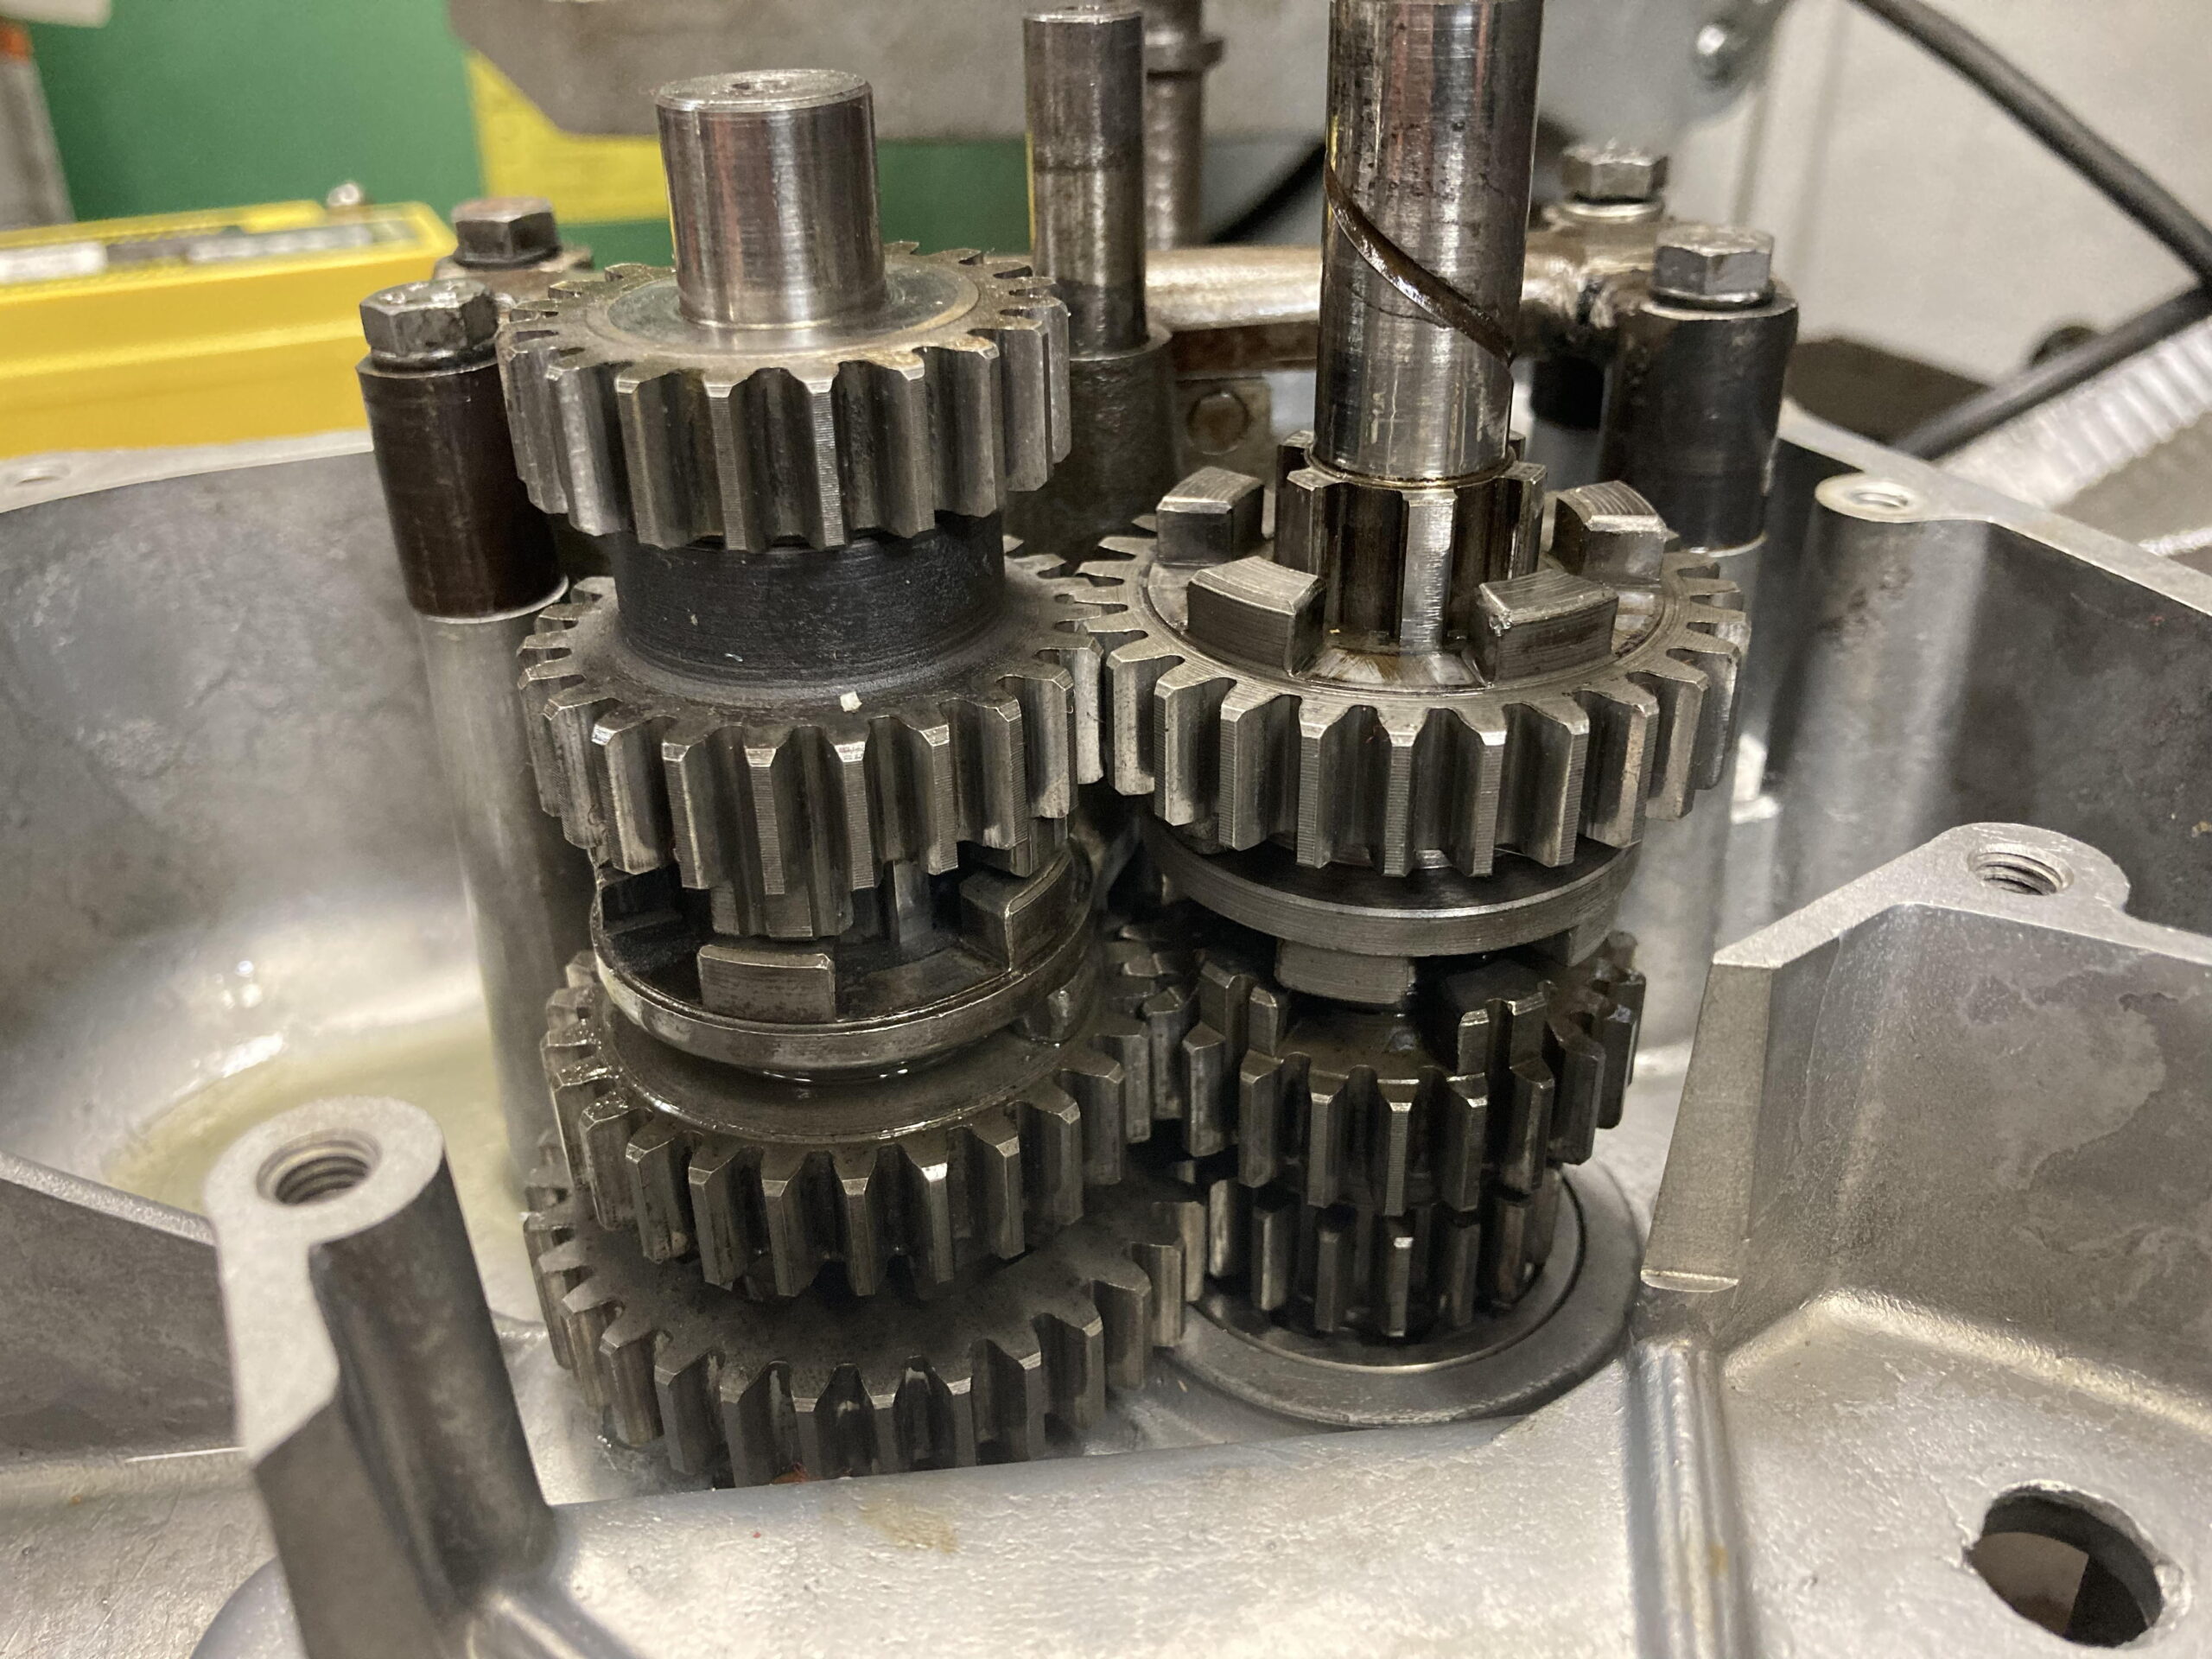
In the next picture, I have pulled out the layshaft and top two gears and installed the sliding gear with it’s shifter fork on the mainshaft. The only problem is that somehow I put it on upside down. The gear needs to be above the shift fork on this one. As you can see the gear is below the shift fork on the layshaft; that’s correct. If you get either of these gears reversed on their shaft you will soon run into unresolvable problems.
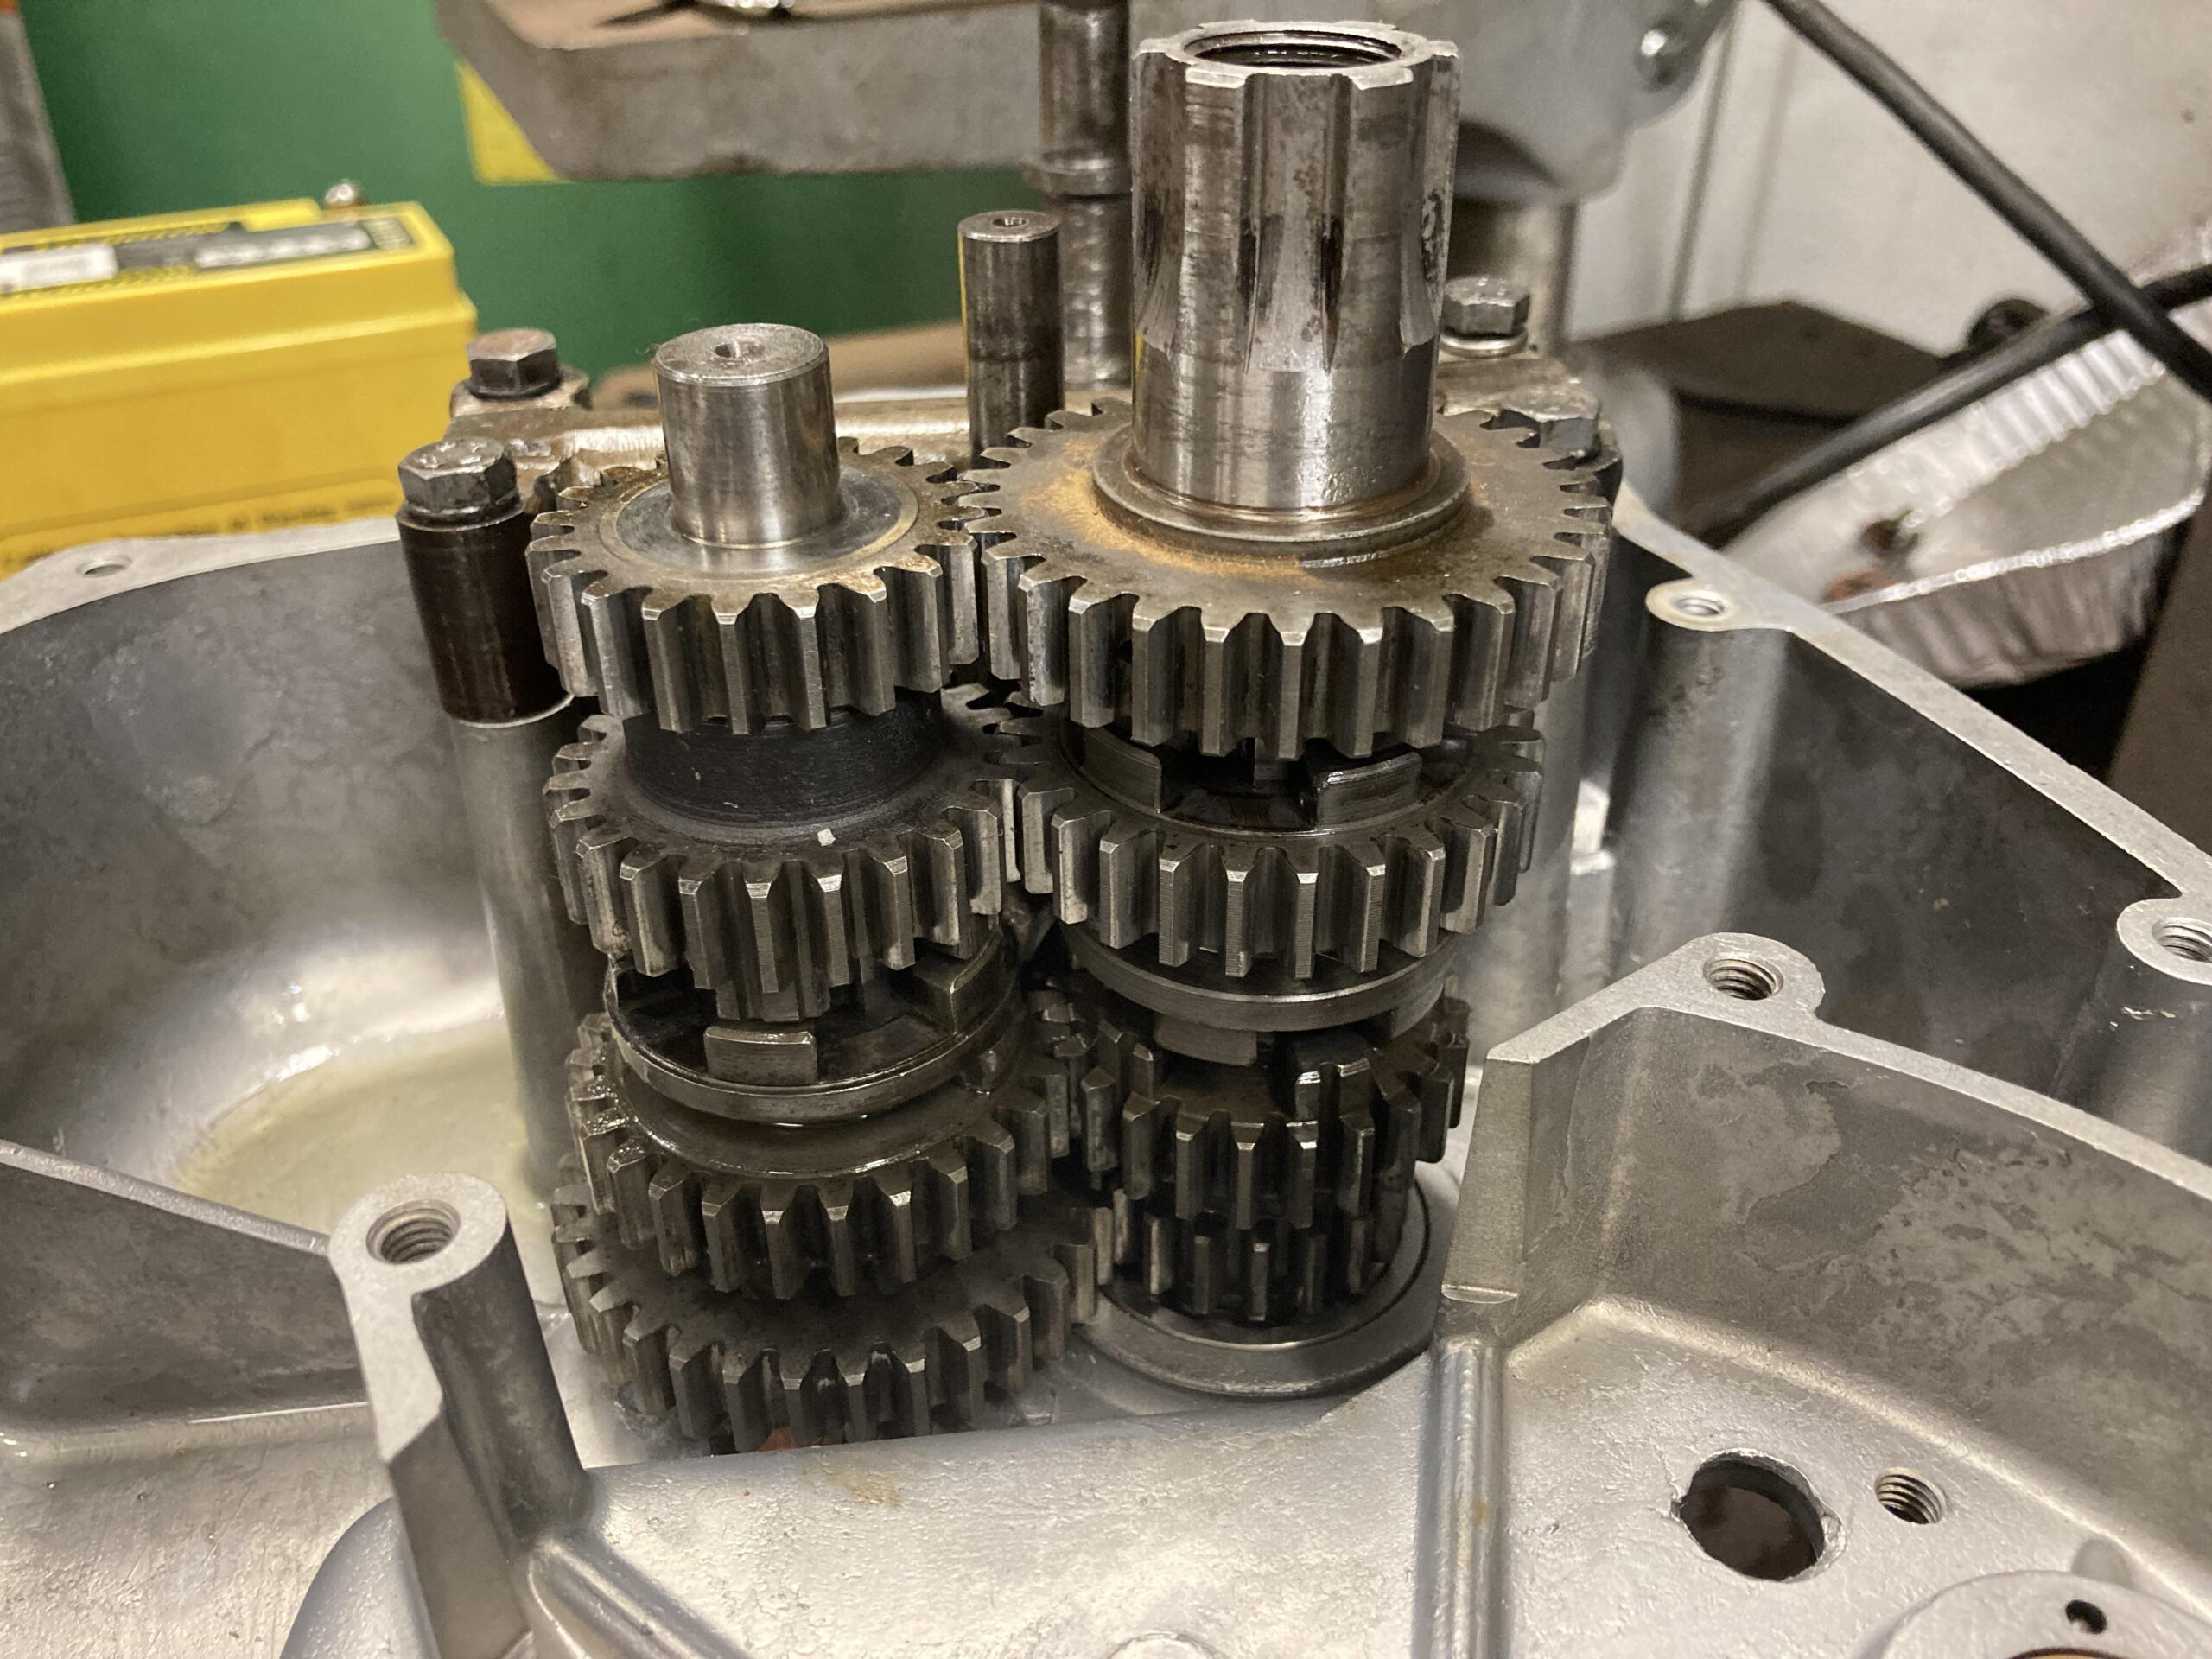
Here is the correct installation:
The full gear cluster. Note the dusting of rust on top of the countershaft gear, from sitting next to the corroded countershaft ball bearing.
In neutral the lower pin of the shifter head is actually hanging out in space, but if you turn the shift lever clockwise (push the front of the gearshift lever down) it will swing over and catch the end of the shift selector plate and push it to the right (down) to shift into first gear.

At this point you should check your work by shifting through all the gears and back to neutral. If you have trouble doing it with the gearshafts unsupported, it’s easy to temporarily install the right side engine case with a couple screws to hold it in place. Then you can turn the mainshaft by hand on the primary side while shifting with the shift lever installed. It’s helpful to have a third hand available to put some resistance on the countershaft sprocket and confirm the changing gear ratios.